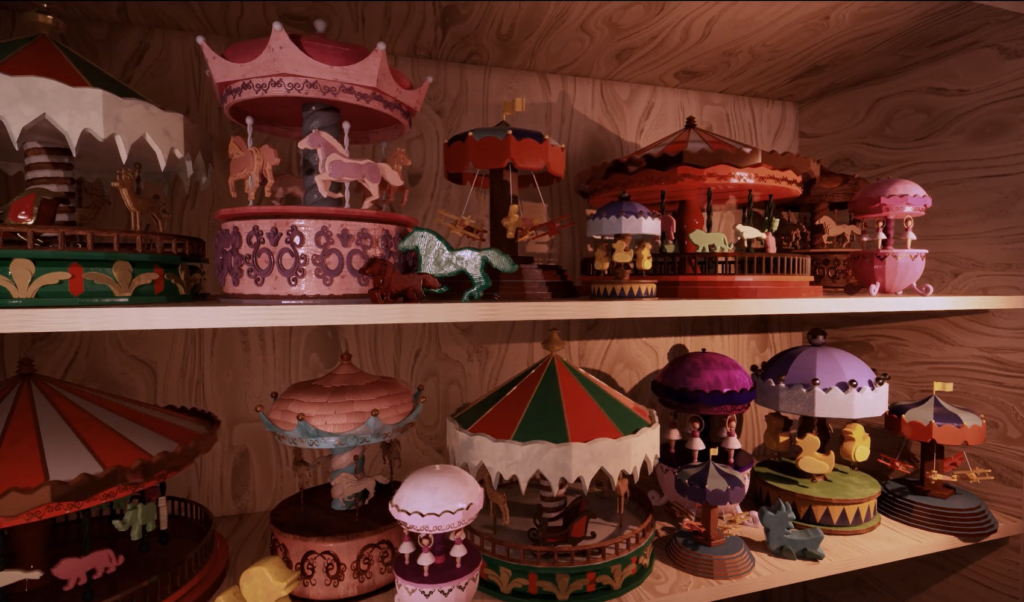
Final Product Update
A variety of textured carousels created entirely using the finished tool!
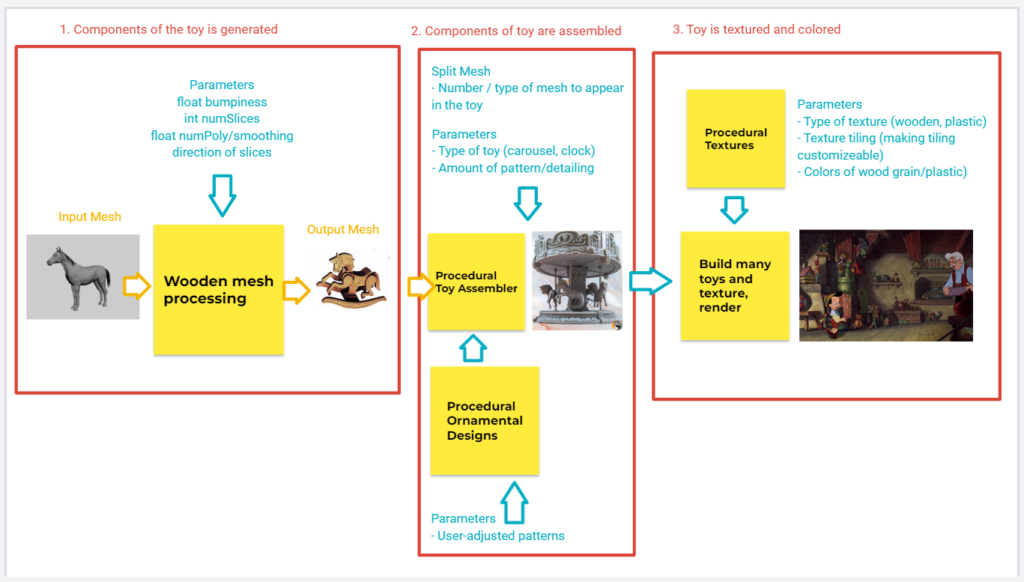
To improve upon the first iteration tool, we decided to expand on the styles of carousels that the tool could generate. I worked on new procedural components like box/base types, non-animal figures, and additional options to the crown, column, and roof.
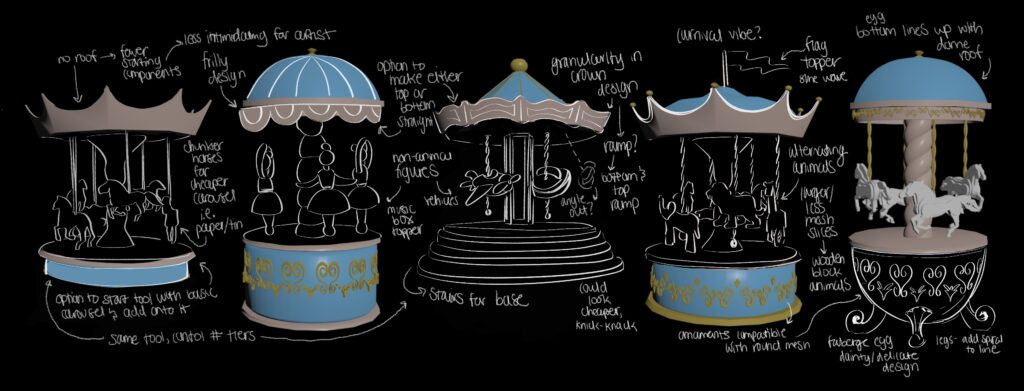
Here’s an image that I sketched out in Procreate, in planning for the next milestone, on top of output from the original tool.
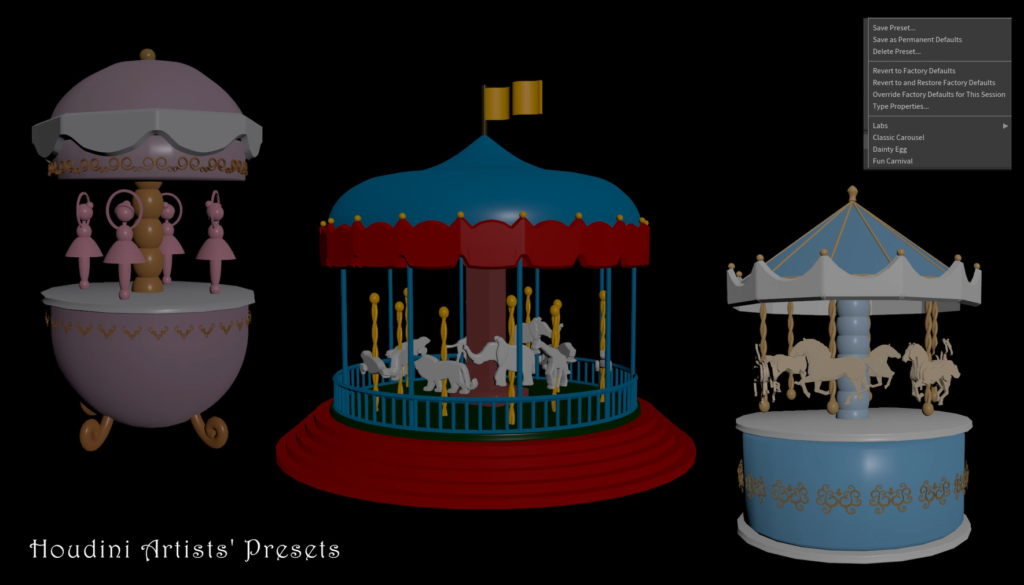
I also used Houdini’s functionality to create presets. Since our tool is very technical, with what may be an intimidating level of customizability, I felt it was important to give artists’ a starting point. The tool user can choose between three presets with different vibes, and then make tweaks based on the tool’s organization by carousel part.
Finally, I helped my collaborator, Claire, who textured and rendered a bunch of carousels to create a cozy, workshop-esque scene. Here’s some images from the final render!
Ideation and First Iteration Tool
This is my final project for Procedural Computer Graphics class. I’m working on creating procedural wooden toys with two other team members.
Here’s an update of our progress, as of mid-November.
- We are interested in procedural tool development for artists, as well as algorithmic mesh manipulation.
- In exploring wooden toys, we have to solve such problems, including slicing mesh to become wooden figures, and creating user–customizable tools that produce stylized objects.
Inspiration and design guide
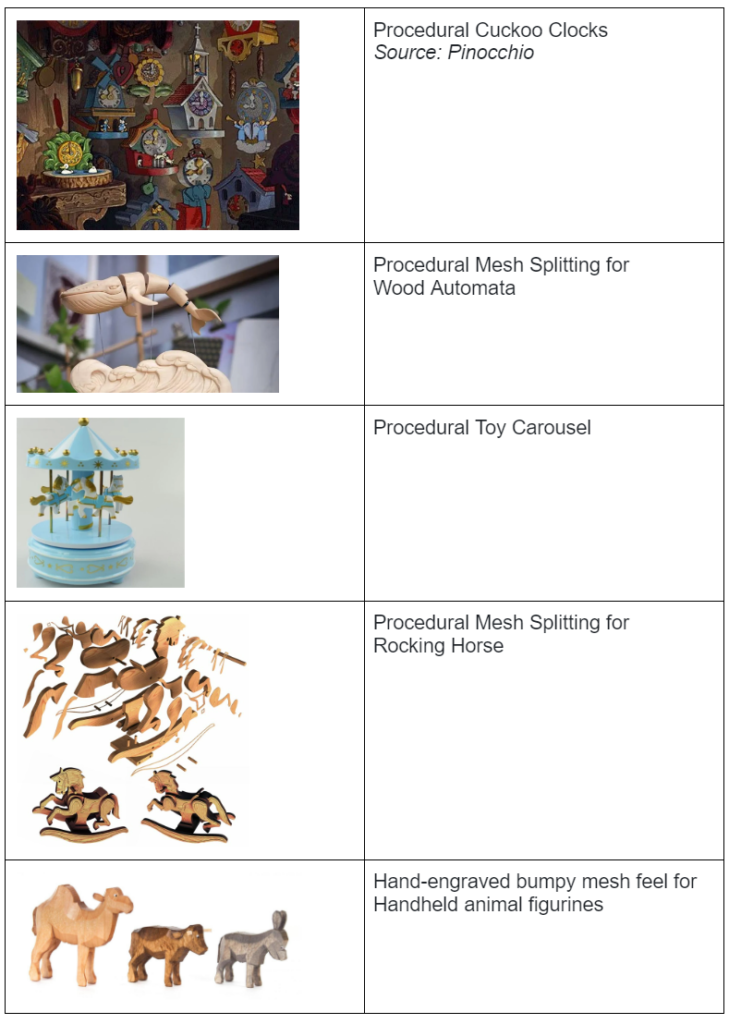
- Inspired by Gepetto’s wood toy workshop in Pinocchio, we wanted to create tools to generate charming handmade-style wood toys.
- We had the following ideas for what types of toys to generate and how we would go about it.
Procedural toy Carousel tool
Overview:
I wanted to dive deeper into Houdini’s techniques and resources by creating an animated carousel generator, challenging myself to balance parameters that always produce desirable results with flexibility and aesthetic input in user design.
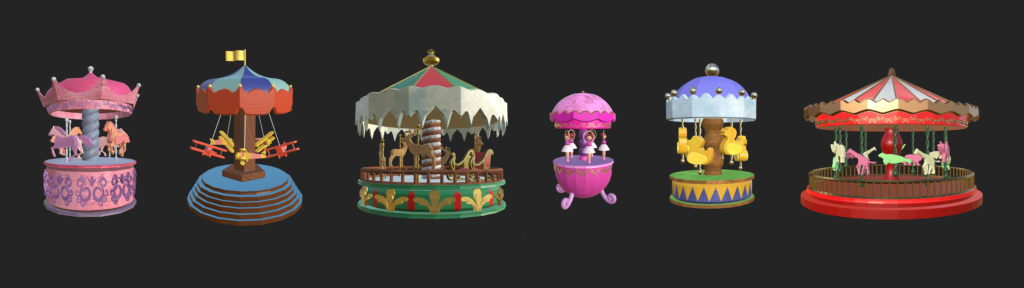
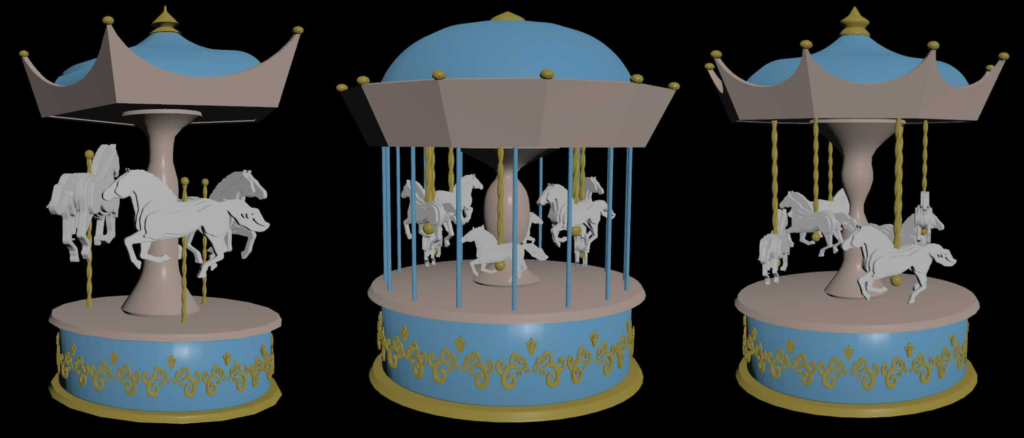
I currently have a tool that can create a variety of carousel types, with three shown below, and plans to further build on the generator and develop stylistic details.
I also animated the carousel by varying some parameters with the frame rate $F.
I am currently working with two wonderful team members, Diana and Claire, whose contributions are mentioned below.

Breakdown of Tool:
- Options that can be changed include the carousel height, radius, divisons (tent shape, horse count), and panels height.
- The user can also use ramps to customize the decorative topper and the main column.
- Toggles include outer columns, as well as a switch between horses that are suspended and horses that are grounded.
- To add some extra adjustment, I also added manual sliders for horse size and horse height, even though they are already decided by other variables like radius and divisions.
- Moving forwards, I hope to organize the parameters by carousel part, as well as add details while maintaining desirable outputs.
Process:
- I split the overall carousel into parts and worked on each one in subnetworks: Columns, Roof, Base, Music Box, Horses, and Integration. I’ll discuss a few of the key implementation features below:
- Columns, Base
- The columns and base form the upper half of the carousel. They are the fundamental building blocks of the carousel, and their size determines how the rest of the pieces fit. Thus, I used two main variables, radius and divison, to track the size of base and the height of the columns. I used many MatchSize nodes in order to fit pieces in the carousel.
- Roof
- The roof is composed of two parts, the panels and the center tent-like structure. I modified a tube for the panels. For the tent, I added a line with two bend nodes, one for a concave bend and one for a convex bend. The user can adjust the shape of the roof. The roof took some troubleshooting, as the tent needed to fit neatly inside the panels. However, I had to fiddle around with the MatchNodes, as my roof components were angled such that selecting min/max still produced intersections.
- Horses
- Poles: I created the twisted poles using a resampled line and two sweep nodes.
- Horses: The horses are split into two groups, even and odd numbered, as the two groups are offset from each other and move at different heights. The size of the horses are determined by how many there are, which is in turn determined by the number of divisions.
- I took the outline from my carousel base to determine where the horses should be placed, using copy to points and orient along curve nodes to point them in the circular direction.
- I then had to perform bounding tests so that their poles would not stick out of the mesh during the animation. I ended up using a clip node for this.
- There are two types of horses that require different placement: grounded horses and suspended horses.
- Integration
- I integrated my teammates milestone projects into my own in order to create the assembled carousel.
- I first imported Diana’s sliced wooden horse mesh as an FBX. I decided not to use the HIP file because of input mesh dependencies, but I’ll fix this next week.
- I found that Diana’s processed mesh really slowed things down, so I decided to pack them, which meant that in animating and clipping my horses, I was limited to working with the poles as I couldn’t edit the mesh.
- I also imported Claire’s HIP file for ornamental designs. I turned her project into a subnetwork to create the ring of designs on the music box. Next week, I’ll add the controls for her tool to the interface for mine. I also hope to add some designs on the panels.
- Optimizations
- This project taught me to dive deeper into Houdini’s performance tools, particularly its Performance Monitor and Dependency List view. As I worked with heavily processed meshes and attempted to animate them, the performance monitor was a huge help in figuring out bottlenecks when my frame rate was slow. I used it to figure out that the bounding box test for the horses’ poles was too inefficient, leading me to switch to clip nodes. Furthermore, I used Dependency List views to keep track of the interrelated variables that I use at many parts in my network.
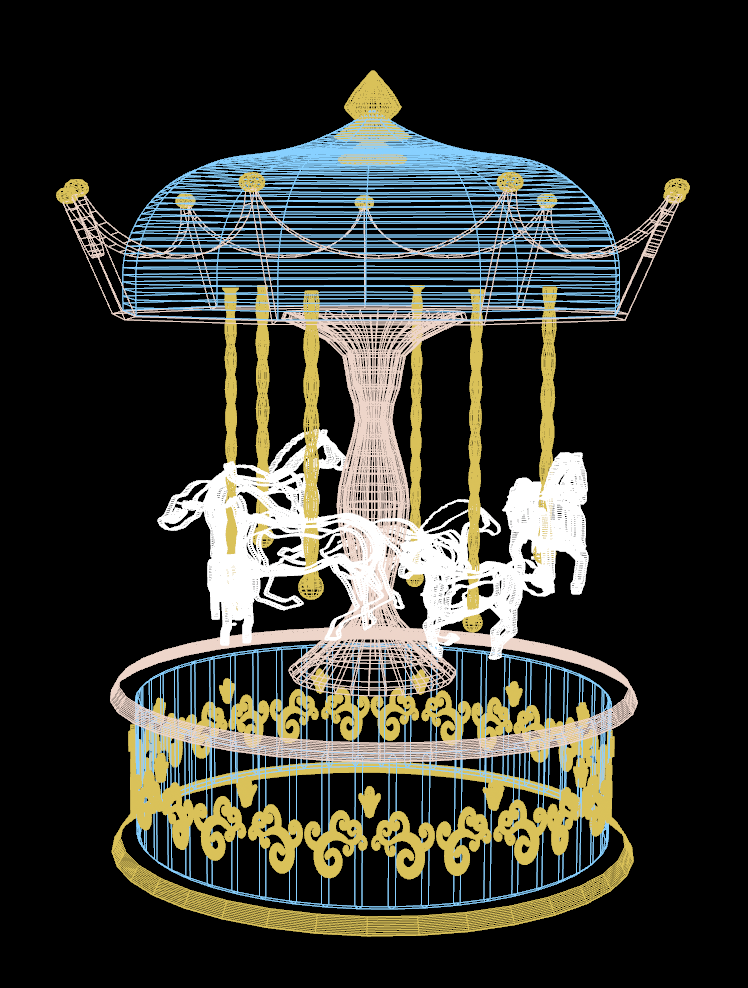
- Overall, I think I stuck pretty well to my goal of creating a usable tool. I also tried to maintain a clean wireframe. I noticed that many computation-heavy parts of the carousel slowed things down, so I was conscious about keeping the mesh clean and organized. Below is a screenshot of my wireframe.